
Welcome to Wreath Week!
After today's post, you'll know everything you need in order to make a gorgeous natural wreath base, you lucky things!
{And did I mention free?}
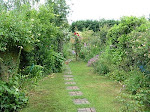
They're pretty quick to do once you know how and the best thing is, the base can easily be made from prunings from your garden, or the local countryside.
{And did I mention gorgeous?}


And in it goes...


{Are you with me so far? You are? I've always thought you were particularly clever...}


{And did I mention free?}
They're pretty quick to do once you know how and the best thing is, the base can easily be made from prunings from your garden, or the local countryside.
{And did I mention gorgeous?}

Then, over the next few days, I'll share how I've made several different styles of wreath: from the lovely and natural to the super-duper festive!!
On Friday, I'm going to have a Wreath Party for people to link up all your beautiful wreaths. And guess what? You're ALL invited!
Yes, I've made my first ever button to celebrate my Wreath Party.
{Oh my goodness, I can't even begin to tell you how long this took me...}
Please would you mind putting this button on your sidebar to spread the word?
{If you have Blogger, just copy the html in the box below the button and paste into the html widget on your side bar in the design page of your Dashboard}.
THANK YOU!
Wreath bases can be made from any long and pliable stems. The best kind to use are willow, honeysuckle, vines and ivy but if you know another kind of tree with long bendy stems that needs a cut, then by all means use those!!
{Okay, ready? Do you have your stems? Then off we go....}
Step 1
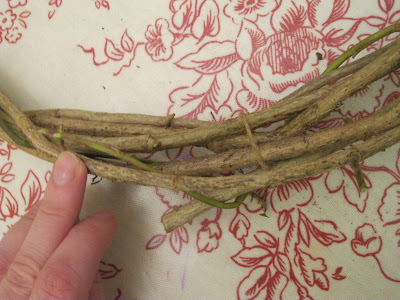
Start off with three or four long stems, which will end up being roughly the circumference of your finished wreath. Lay them out in parallel but stagger them slightly, like this:
Start off with three or four long stems, which will end up being roughly the circumference of your finished wreath. Lay them out in parallel but stagger them slightly, like this:

Tie them together together once at each end with jute string.

One end...

...and then the other end...
Step 2
Now bend the whole thing round to form a circle. Let the ends cross over at the top.

...and tie together where the two ends cross over.

Pull the loose ends down each side of the circle, twisting them round the rest of the stems....

...and tie in place with jute string.
Please don't worry if at this point it's all looking rather messy and not very circular. The beauty of this method is that the shape is made firmer as more stems are added.
{See? Mine is pretty messy at this stage, even though I've done it lots of times before...}
{See? Mine is pretty messy at this stage, even though I've done it lots of times before...}

Step 3
Now, get another stem and poke the thicker end into a gap in the wreath base to secure it. Use the less pliable stems at first and leave the very bendy ones until the end.
Here, I am poking my stem into the wreath base:
Now, get another stem and poke the thicker end into a gap in the wreath base to secure it. Use the less pliable stems at first and leave the very bendy ones until the end.
Here, I am poking my stem into the wreath base:

And in it goes...

Start wrapping it around the other twigs. The easiest way to do that is to bend it gently through the middle if the circle.....

...and out the other side, and then bend it round again gently, up and over the outside of the wreath, in through the middle of the circle, and out the other side. Towards the end of the stem, it's usually much more pliable and can be wrapped more tightly without the risk of breaking it.

...but if it does snap...and some probably will....it doesn't matter one jot. Either tuck it in as neatly as you can, or take it out altogether, and start again with a new stem.

When you get to the end, just tuck it into the other stems in the wreath base to secure it.

And then repeat with the next stem.

And the next....wrapping each stem in and out of the centre of the circle as many times as you can.

With each stem, take a step back and see which part of the wreath most needs shaping and then concentrate on that part.
For example:
For example:

Can you see that my wreath is wonky here:

so that's where I concentrated my efforts, pulling extra tightly around that area. Keep going until it looks something like this:

{Are you with me so far? You are? I've always thought you were particularly clever...}
Step 4
If your wreath base is looking slightly misshapen, you can squeeze it a bit on either side to push it into shape. This is the way I do it:
If your wreath base is looking slightly misshapen, you can squeeze it a bit on either side to push it into shape. This is the way I do it:

Step 5
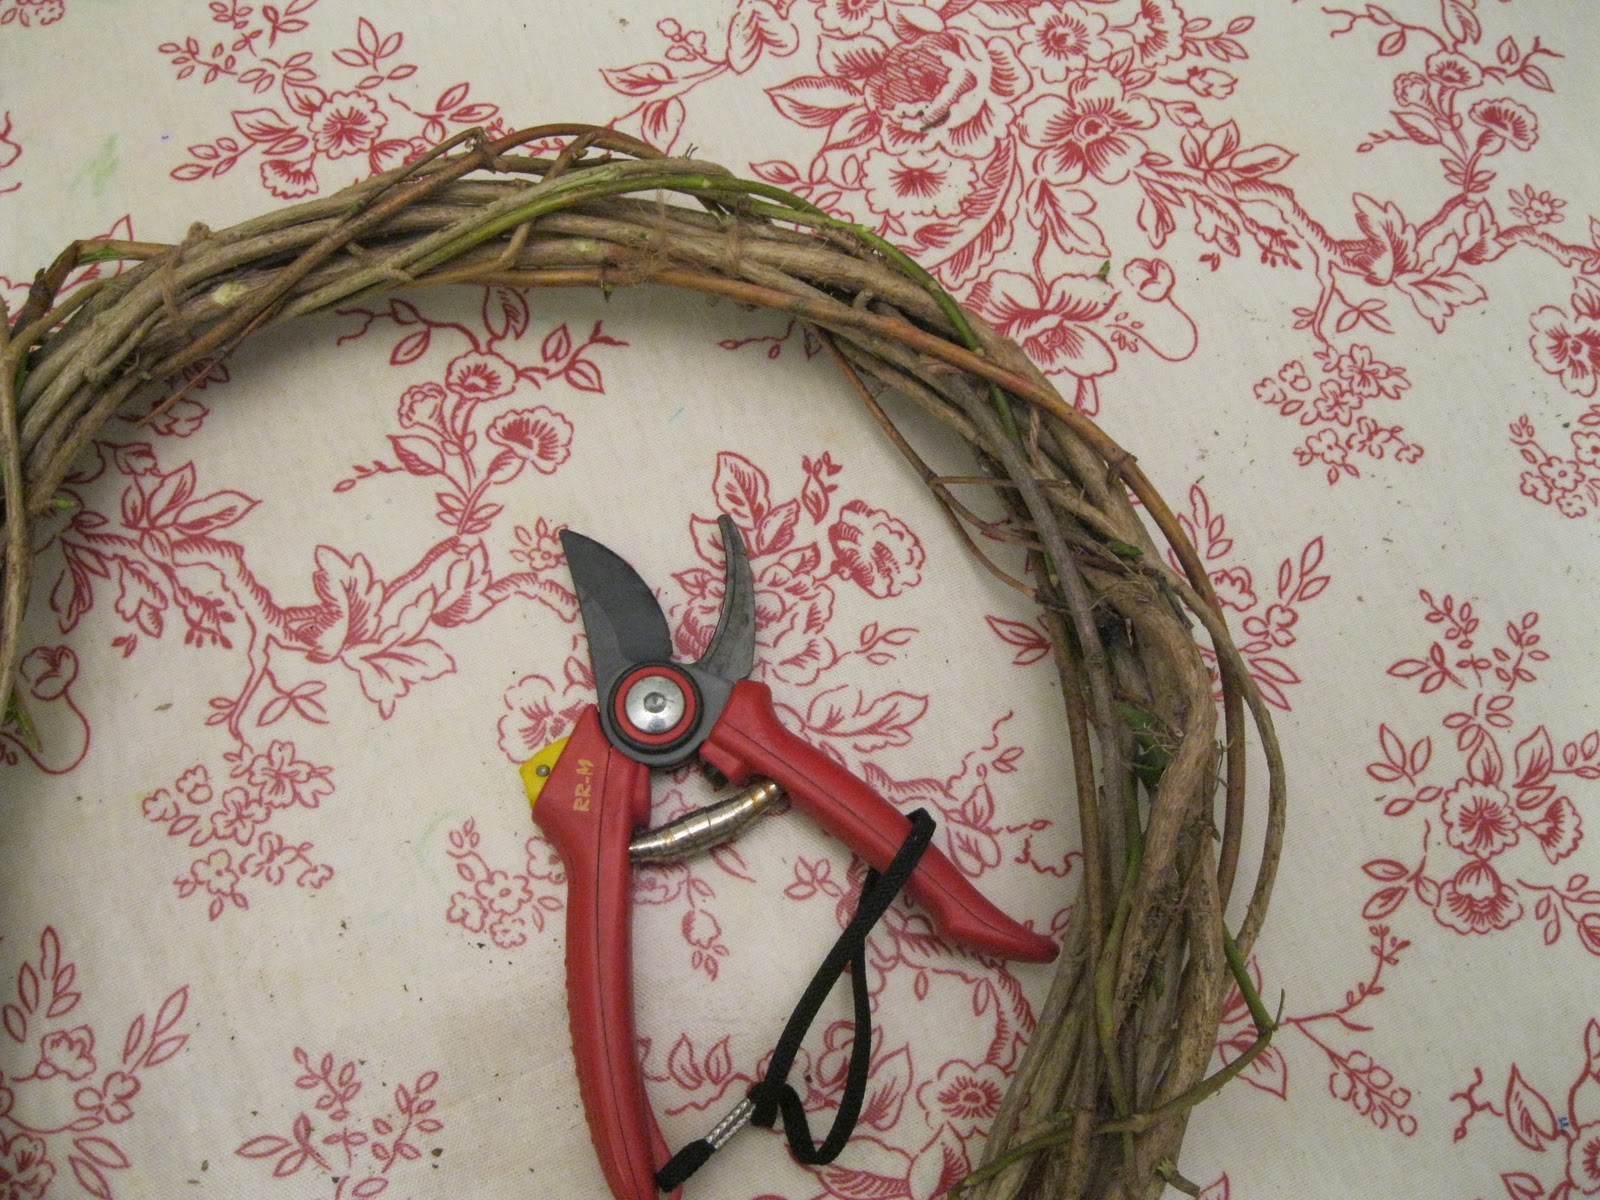
If you notice any stray ends, just snip them off with sharp scissors or secateurs.
If you notice any stray ends, just snip them off with sharp scissors or secateurs.

Step 6
Now that you're near the end, make sure you choose the super-bendy stems to work with. These will form the holes to tuck your wires and foliage into later....

Then, when you've finished, stand back and admire your beautiful wreath base.
This probably took me about fifteen minutes, including cutting the stems from my garden.

{And at least five minutes of that was gearing myself up to venture out into the snow for you...}

I love making wreath bases. They're incredibly satisfying.
But best of all is that now you've got the perfect foundation for making some absolutely stunning wreaths.
Come back tomorrow and I'll show you how...
{Hint: You're gonna love me forever}


43 comments :
Looking great Sarah!!!! I am excited that it's wreath week!!!
Erinoooo
great tutorial. I would never have thought to make your own wreath base! can't wait to see more!
I never have seen that done. Thanks for sharing. Looks easy.
Oh wow, you meant you were making the actual wreath itself! Cool. Can't wait to see how you decorate it.
I decorated a wreath...I think I'm going to post about it tomorrow, but I will link that post to your party Friday.
And don't forget my Knock-Off party, also Friday :)
I thought you were just going to be decorating the wreaths....this is even better. Wreath forms can get really expensive! I can't wait for the rest of the series and the party on Friday!
That is so cool!!! I never thought of that! I would have cheated and gone out and bought one! :) We have so many vines and sticks where I am I really should try that one year! I am excited to see what you are going to do with it, you clever girl you!!! I am also now going to use the word "wonky", I love it!!! :)
Hey Sarah ~ I posted your button. Your tutorial is great and guess what? I have the same pruning shears as in your picture. I can hardly wait to see what comes next.
Could you share how you made your button?
Cindy
I can't wait to see what your fancy dancy ones will look like...way to go on your first button !
I wasn't going to make a wreath but I think you just talked me into it!
Your friend Melissa
Hey, so cool!! Off to do some pruning!
*hugs*deb
Ooh need to venture into the garden now and find some flexible stems...are dogwoods any good cos they have amazing colours...and I know I have a few shrubs in the garden that could do with a prune? I'm really looking forward to the rest of the tutorial...this bit was very clear...thanks so much!
Oh man! I love your button... ya know why? Because they take forever to make. I can appreciate a good button. Fab! I'll be sure to add it...
Great tutorial! 15 minutes...really? You go girl!I never think to use trimmings from the garden. Can't wait to see what you do!
What am I sitting here for I better get making a wreath!
Take care, Sarah x :)
xx,
Michelle
What a great idea to make a wreath with your readers step by step!
Today I posted two garlands, but they have a galvanized iron base covered with a fabric tubular
I cannot wait to see your wreaths finished
Soon
Mari
Gorgeous, Sarah. I wish I had access to such greenery around here.
Whoop whoop we are off into wreathmaking heaven modern country style!! I will attempt the button, but since trying to fiddle with htmls with hopeless results for blogrankings, I might need to email you an sos!! I am sure for the rest of blogland it is a cinch, I am just an IT rabbit in headlights!
Sarah, this is awesome!! I would never have thought to make my own wreath, but I'm putting it on my To Do list right now! I just have to think about where I can snag some stems! Will add the button too - good for you for figuring out how to make it!
Dear Sarah, As you may expect, the only part of your marvellously illustrated wreath making course that I feel capable of achieving is the part where I can snip and slice with secateurs. As for the rest.....and the Blogger button.....I am just looking forward to the party and seeing everyonelse's wreaths looking marvellously dressed for the occasion!!!
Never have I made my own base. What a great idea. You know, I sort of like it as is Sarah, but I'm sure that you will do something very nice with it.
-Rene
Sarah lovey well done. I am without hope in the making of things but will read daily...pinkie swear. merry♥O
Oh to have a countryside - or a garden - at this house. I will live vicariously through you here. On another note - I HEART THAT CHRISTMAS PICTURE A FEW POSTS DOWN. Oh my. That is completely my idea of comfort in the season. Saving for my files. Love the table (Saw horses?)
Your step by step instructions left nothing out. I can't believe you have the stems from your yard. I don't have one stemming bush outside to work with. It's dry in California. we have tumbleweed. I can make a snowman with the tumbleweeds. That's about it!
Can't wait to see the finished product. Have a great day!
Leslie
I'm loving this idea. Lord knows I have plenty of bare branches around this yard. I might as well put them to use!
great flash mob ;P You are all busy for christmas already I guess, Me myself I took out the first things this last weekend too;)
This is so cool! I would have never thought of making one myself!
My brain has gone into overdrive...the only bendy stems that I can think of in my garden are bounganvillea (and they have thorns a mile long!) Will have to take a bit of a wander and see what I can find. So excited by this little project! ;)Sharyne
I love this wreath just on its own! I'm so excited to see what you have tomorrow. I happen to have a wreath post ready for today, so I can use that for the party on Friday! Woo!
Hey friend! So excited for wreath week and I'm adding your button to my blog! You may even get me to try my hand at making one of these suckers...maybe! :-)
Vanessa
That's my gifted friend!
My goodness! I love the things you make. They always, always look perfectly perfect! :-) :-)
By the way, Sarah.. I truy appreciate your comment about my post. It's so nice when you hear that you're doing a good job. Yesterday I was doing that post until late night, so it's very rewarding to read your comment today.
Have a great week!
xo
Luciane at HomeBunch.com
Hi Sarah! You are truly the smartest one! This is a wonderful tutorial for us.
Thanks for popping in to see me and your sweet words.
Be a sweetie,
Shelia ;)
L... Laughing all the way, ha ha ha! Love & Laughter! M... Merry! N...Noel! O... Oh, I better stop playing on the computer and make that wreath :)
Have a lovely night!
~Michelle
WELL! tHIS IS FUN SO FAR. i LIKED THE WAY YOU ADDED PICTURES TO SHOW WHAT YOU MEANT-IT HELPS TO HAVE A VISUAL. i'VE MADE MY OWN WREATHS LOTS OF TIMES AND THEY NEVER LOOK AS GOOD AS YOUR SAMPLE HERE. i WILL HAVE TO BE MORE METHODICAL AS YOU ARE. aLRIGHTY THEN, CARRY ON!
shoot. I was in all caps and didn't know it sorry
My neighbors just put a bunch of branches to the curb. Do you think they would mind if I swiped a few? They already think I'm weird for spray painted the contents of my house at 8 in the morning in my pajamas. But I have a feeling swiping their yard clipping will take me off their Christmas card list for sure! LOL! : )
Hi Sarah,
I never thought of making my own twig wreaths. This is a wonderful tutorial. I can't wait to see what you make the rest of the week!
Blessings,
Marcia
Hmmm...you make it look so easy. I made a wreath last week with, dare a say, a store bought grapevine wreath. It looks okay, but now the greenery is drying out. I'll have to fix it up before your Friday link up. Can't wait to see what else you have in store :)
I thought I would get a wreath made today...no chance...there will be one! Great tutorial! I put your fancy button on my blog!
Dislike wreaths. Remind me of funerals. Even the word looks a bit like "deaths"!
However, you are very clever at them!
xxx
I have never made a wreath base. I've always purchased the base and added things to it. This is a great idea. I can't wait to see the wreaths you make.
Fantastic tutorial!!!! Thank you so much for sharing. I knew that it was possible to do that, but I've never felt like figuring it out. I can't wait for your wreath party!
Sarah, I did something similar to make a garland in the fall (forgot to post about it). I soaked my cutting the night before which helped them from snapping. Great tutorial!!! Thank you for linking up to "Amaze Me Monday" blog party. I hope to see you next week!
What a great tutorial. It looks wonderful. Thanks for linking to TTT. Hugs, Marty
I never would have even thought of doing that! thanks for the great tutorial and thanks for linking up @ crazydomestic!
Now I can make a normal looking wreath! I've tried making grapevine wreaths before, but they always come out wonky. Thanks for the tutorial!
That is awesome. Thanks for sharing over at Tuesday Tell All!
So very cool! And you wrote a great tutorial! Thanks so much for linking up to the Christmas SFS! -shaunna :)
Post a Comment